How to Clean Every Type of Fan Without Damaging the Motor
To safely clean any household fan and restore optimal airflow, follow this universal sequence:
- Unplug: Always disconnect the power source before touching the grill or blades.
- Dust: Use a vacuum with a brush attachment or a dry microfiber cloth to remove loose surface debris.
- Wash: Wipe down blades and grills with a barely damp cloth (or wash removable plastic parts in warm, soapy water).
- Dry: Allow all components to air-dry completely for at least 60 minutes to prevent electrical hazards.
- Reassemble: Secure all clips and screws before plugging the unit back in.
A dusty fan does more than just look unsightly; it actively works against your home's air quality and energy efficiency. When dust accumulates on the leading edge of a fan blade, it alters the aerodynamics, forcing the motor to work harder to push the same amount of air. Over time, this buildup can lead to mechanical failure, increased electricity bills, and the constant circulation of allergens throughout your living space.
Whether you are dealing with a standard box fan, an intricate tower fan, or a ceiling fan suspended high above your living room, proper maintenance is essential. This guide covers highly effective methods for cleaning every type of fan, auditing popular viral hacks, and providing step-by-step instructions to ensure your appliances run smoothly and safely.
Why You Should Never Skip Cleaning Your Fans
Ignoring fan maintenance is a common household oversight, but the consequences extend beyond mere aesthetics. Regular cleaning is a critical component of home health and appliance longevity.
The Health Impact of Circulating Dust
Fans do not create dust, but they are highly efficient at distributing it. As blades spin, they generate static electricity that attracts airborne particles, including pet dander, pollen, and dust mites. When you turn on a dirty fan, these accumulated allergens are forcefully ejected back into the room's breathing zone. According to indoor air quality experts, running a heavily soiled fan can exacerbate asthma and allergy symptoms, making regular cleaning a necessity for respiratory health.
Efficiency and Energy Bills
The physics of airflow dictate that a smooth surface moves air more efficiently than a textured one. When a thick layer of dust coats a fan blade, it creates drag. This drag forces the internal motor to draw more electrical current to maintain its rotational speed. A clean fan operates with significantly less resistance, moving more cubic feet per minute (CFM) while consuming less power.
Fire Safety and Motor Strain
Perhaps the most critical reason to maintain your fans is fire safety. The motor housing at the back of a pedestal or box fan contains vents designed to dissipate heat. If dust and hair clog these vents, the motor becomes thermally insulated. As the internal temperature rises, the risk of the motor burning out—or in extreme cases, sparking a fire—increases dramatically. Keeping these vents clear is a fundamental safety practice.
Recommended Cleaning Frequency
For optimal performance, a routine surface cleaning every two to four weeks is widely recommended. A comprehensive deep clean, involving disassembly and motor inspection, should be performed at the beginning and end of the heavy-use season (typically spring and autumn).
What Tools Do You Need to Clean a Fan Properly?
Attempting to clean a fan with a wet rag and standard paper towels often results in a frustrating, smeared mess. Gathering the right tools beforehand ensures a thorough clean without risking damage to the electrical components.
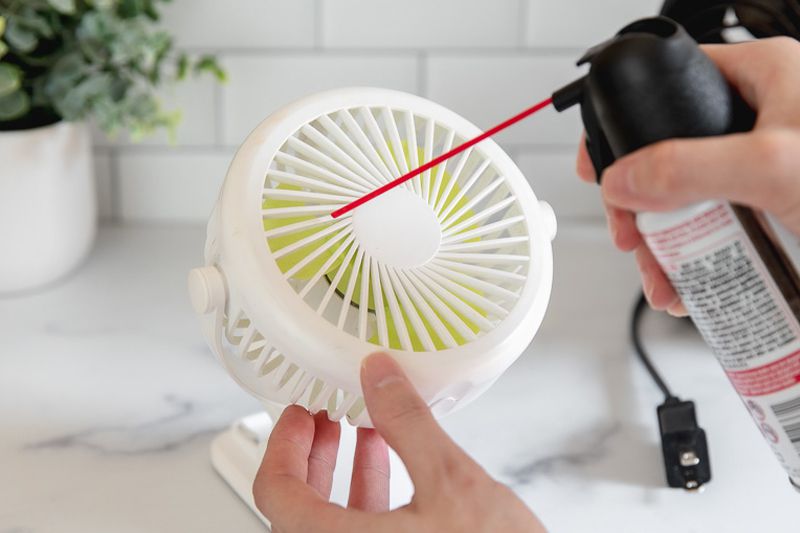
Image source: The Spruce
The Basic Maintenance Kit
- Microfiber Cloths: Unlike paper towels, which leave behind lint and push dust around, microfiber actively traps and lifts dust particles.
- Mild Dish Soap: A few drops of standard dish detergent mixed with warm water is sufficient for most plastic and metal components.
- Vacuum with Brush Attachment: The soft bristles dislodge dust from grills while the suction immediately removes it from the air.
Specialized Tools for Better Results
For deep cleaning or tackling specific fan types, consider adding these items to your kit:
- Compressed Air: Canned air (or an air compressor used outdoors) is an excellent tool for clearing dust from internal motor housings where vacuums cannot reach.
- Long-handled Paintbrush: A clean, dry craft brush or paintbrush is highly effective for sweeping dust out of the narrow intake slats of tower fans.
- Degreaser: For fans located in or near kitchens, a dedicated degreaser like Simple Green is necessary to break down sticky cooking oils.
- A Standard Pillowcase: The essential, mess-free tool for cleaning ceiling fan blades without dropping dust onto the furniture below.
Never use paper towels to wipe down fan blades. The coarse wood fibers in paper towels can create micro-scratches in plastic blades, which actually gives future dust a better surface to cling to. Additionally, avoid scouring pads (like steel wool) on painted metal grills, as this will remove the protective coating and invite rust.
How to Clean a Fan Without Taking It Apart
If you are short on time or lack the tools to remove a fan's grill, you can still achieve a significant improvement in airflow and air quality using no-disassembly methods. This approach focuses on removing the bulk of the surface debris.
Time Required: 5–10 minutes
Best For: Routine weekly maintenance, light dust buildup, and sealed tower fans.
Tools: Vacuum, compressed air, dry microfiber.
Effectiveness: Removes roughly 70% of visible dust but leaves caked-on grime intact.
Time Required: 30–45 minutes (plus drying time)
Best For: End-of-season storage, heavy grime, kitchen grease, and noisy motors.
Tools: Screwdriver, soapy water, degreaser.
Effectiveness: Restores the fan to near-factory condition and clears motor obstructions.
The Vacuum and Brush Strategy
Start by unplugging the fan. Attach the soft dusting brush to your vacuum cleaner hose. Turn the vacuum to its highest suction setting and slowly run the brush over the front and back grills. The bristles will agitate the dust clinging to the plastic or metal wire, while the suction pulls it away. For the blades inside, press the brush firmly against the grill gaps to draw out loose particles.
The Compressed Air Flush
If dust is visibly caked on the internal blades or motor housing, take the unplugged fan outdoors. Using a can of compressed air (kept perfectly upright to avoid spraying liquid refrigerant), blow short bursts of air through the back grill toward the front. This forces the dust out through the front of the fan. Pay special attention to the small vents on the motor casing at the rear of the unit.
The "Barely Damp" Surface Wipe
For the exterior housing and the accessible parts of the grill, use a microfiber cloth lightly misted with a 1:3 ratio of white vinegar to water. The cloth should be barely damp, never dripping. Wipe down the base, the control buttons, and the power cord. The mild acidity of the vinegar helps cut through light static-cling dust without leaving a sticky residue.
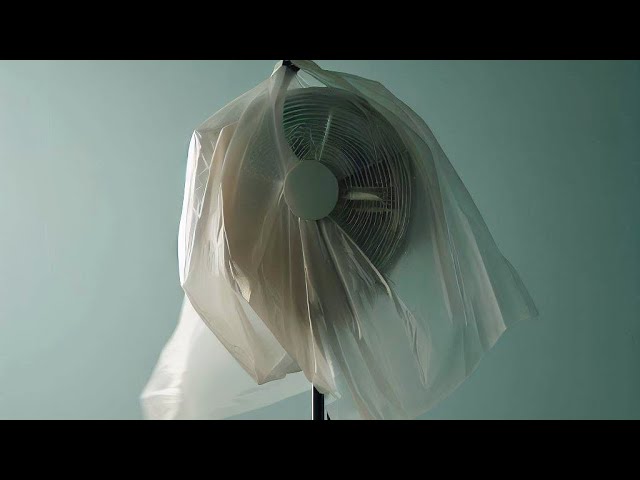
Image source: YouTube
Does the Viral Plastic Bag Fan Cleaning Hack Actually Work?
In recent years, a "no-scrub" fan cleaning hack has gained massive traction on social media platforms. The method claims to clean a fan automatically, but a closer examination reveals significant risks to your appliance.
The Claim
The viral method involves mixing dish soap, white vinegar, and water in a spray bottle. The user heavily saturates the fan's grill and blades with the liquid, covers the entire fan head with a large plastic trash bag, and turns the fan on high for five minutes. The theory is that the spinning blades will fling the wet dust off, trapping it inside the plastic bag.
The Forensic Audit: Why It Fails
While visually entertaining, this method is fundamentally flawed for several reasons. First, spraying a heavy liquid onto thick dust does not magically dissolve it; instead, it turns the dust into a thick, heavy mud. When the fan spins, this mud is flung outward, often clogging the narrow gaps in the grill rather than clearing them.
The Electrical Danger
The most severe issue with the bag hack is the introduction of moisture into the electrical components. Fans are not waterproof. When you spray liquid onto the blades, the aerodynamic force can push that moisture backward along the central shaft and directly into the motor housing.
According to a test conducted by Lifehacker, attempting this viral hack resulted in a fan that malfunctioned severely. Moisture entered the control panel, causing the fan to continue running even after the power button was pressed. The unit had to be left running for an hour to dry out the internal components before it regained normal function. In worse scenarios, this moisture can cause a short circuit, permanently destroying the motor or creating a shock hazard.
The Verdict
This hack is high-risk and low-reward. The time spent mixing the solution, bagging the fan, and cleaning up the resulting muddy residue is often longer than simply vacuuming or wiping the fan down properly. We strongly advise against using the plastic bag method.
How to Clean a Ceiling Fan Without the Mess
Ceiling fans present a unique challenge: cleaning them usually results in a shower of dust falling onto your bed, sofa, or floor. Fortunately, there is a widely regarded technique that eliminates this mess entirely.
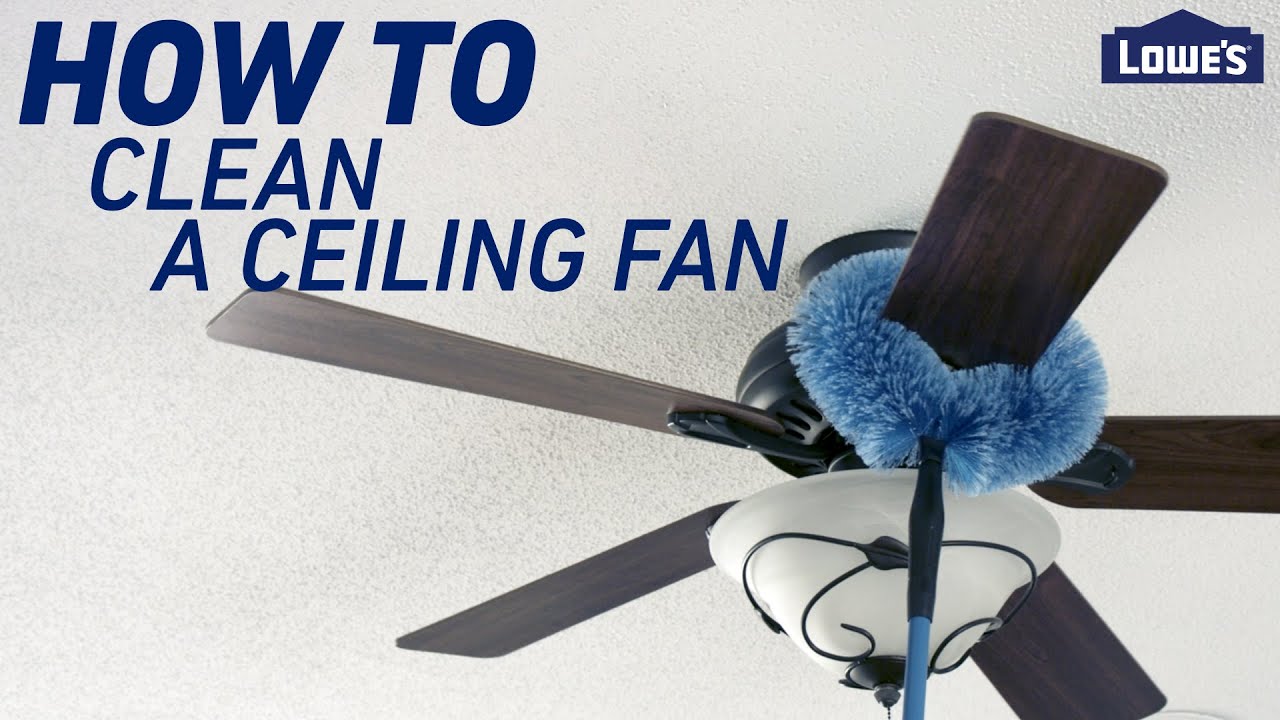
Image source: YouTube
The Pillowcase Technique
The most effective way to clean a ceiling fan is using an old, clean pillowcase. Here is the step-by-step process:
- Secure the Power: Turn off the fan at the wall switch. If the fan has a pull chain, ensure it is in the off position.
- Position the Ladder: Place a sturdy step ladder slightly off-center from the fan motor so you can comfortably reach the blades without overextending.
- Slide and Trap: Open the pillowcase and slide it completely over one of the fan blades, as if you were putting a sock on a foot.
- Press and Pull: Press your hands against the top and bottom of the blade through the fabric. Slowly pull the pillowcase back toward you. The fabric will wipe the dust off the blade, and the open bag will catch all the falling debris inside.
- Repeat: Move to the next blade. Once finished, take the pillowcase outside, turn it inside out to shake off the dust, and throw it in the washing machine.
Checking the Direction Switch
While you are on the ladder, it is an ideal time to check the fan's directional toggle switch, usually located on the side of the motor housing. Hunter Fan Company recommends running the fan counter-clockwise in the summer to create a cooling downdraft, and clockwise in the winter to circulate warm air trapped near the ceiling.
The Balance Warning
When wiping down ceiling fan blades, apply gentle, even pressure. Never lean your body weight onto the blade or pull downward forcefully. The metal brackets (called blade irons) that connect the wooden blades to the motor are precisely angled. Bending one of these brackets even slightly will cause the fan to wobble violently and make a ticking noise when turned back on.
Top Methods to Clean a Box or Pedestal Fan
For standard room fans (box, pedestal, and desk fans), a deep clean requires removing the front grill. This allows you direct access to the blades and the motor shaft, ensuring a comprehensive restoration of airflow.
After unplugging the unit, locate the securing mechanism on the front grill. Most modern pedestal fans use plastic clips around the circumference that can be popped open with your fingers or a flathead screwdriver. Box fans typically require a Phillips-head screwdriver to remove 4 to 8 screws around the perimeter. Place all screws in a small bowl so they are not lost.
Once the front grill is off, unscrew the spinner cap holding the blade in place (note: these are often reverse-threaded, meaning you turn clockwise to loosen). Slide the blade assembly off the metal motor shaft. Take the front grill, back grill, and plastic blades to a sink or bathtub. Wash them thoroughly with warm water and mild dish soap using a sponge. Never submerge the motor unit in water.
Before reassembling, inspect the exposed metal motor shaft. Because fans create a vortex, they frequently pull hair and pet fur from the floor, which bypasses the grill and wraps tightly around the spinning shaft. This hair creates severe mechanical friction, slowing the fan down and causing the motor to overheat. Use a pair of tweezers or a sewing seam ripper to carefully cut and remove any tangled hair from the base of the shaft.
Moisture is the enemy of electrical appliances. Even a few drops of water trapped in the plastic crevices of the blade assembly can be flung into the motor upon startup. Experts strongly advise allowing all washed components to air-dry completely. Wipe them with a dry microfiber cloth, then let them sit in a well-ventilated area for a minimum of 60 minutes before reassembly.
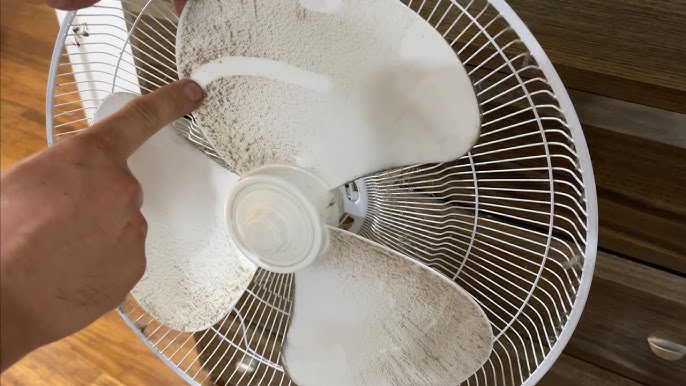
Image source: YouTube
How to Clean a Tower Fan That Does Not Open
Tower fans are notoriously difficult to clean because their sleek designs often feature sealed housings that cannot be easily opened without voiding the warranty or breaking plastic tabs. Because you cannot access the internal cylindrical blade (the impeller), you must rely on external tools.
The Paintbrush Hack
The narrow intake slats on the back of a tower fan are magnets for dust, and vacuum brushes are often too thick to reach inside. To solve this, use a clean, dry, long-handled paintbrush (a 1-inch or 2-inch width works well). While the vacuum hose is held near the fan, vigorously brush the bristles up and down through the slats. The stiff bristles will dislodge the caked-on dust, and the vacuum will immediately suck it away.
Low-Pressure Air Clearing
To clean the internal impeller, take the tower fan outside. Use a can of compressed air or an air compressor set to a low PSI. Blow the air directly into the rear intake vents, moving systematically from top to bottom. You will likely see a large cloud of dust exit through the front grill. Continue this process until the air blowing out appears clear.
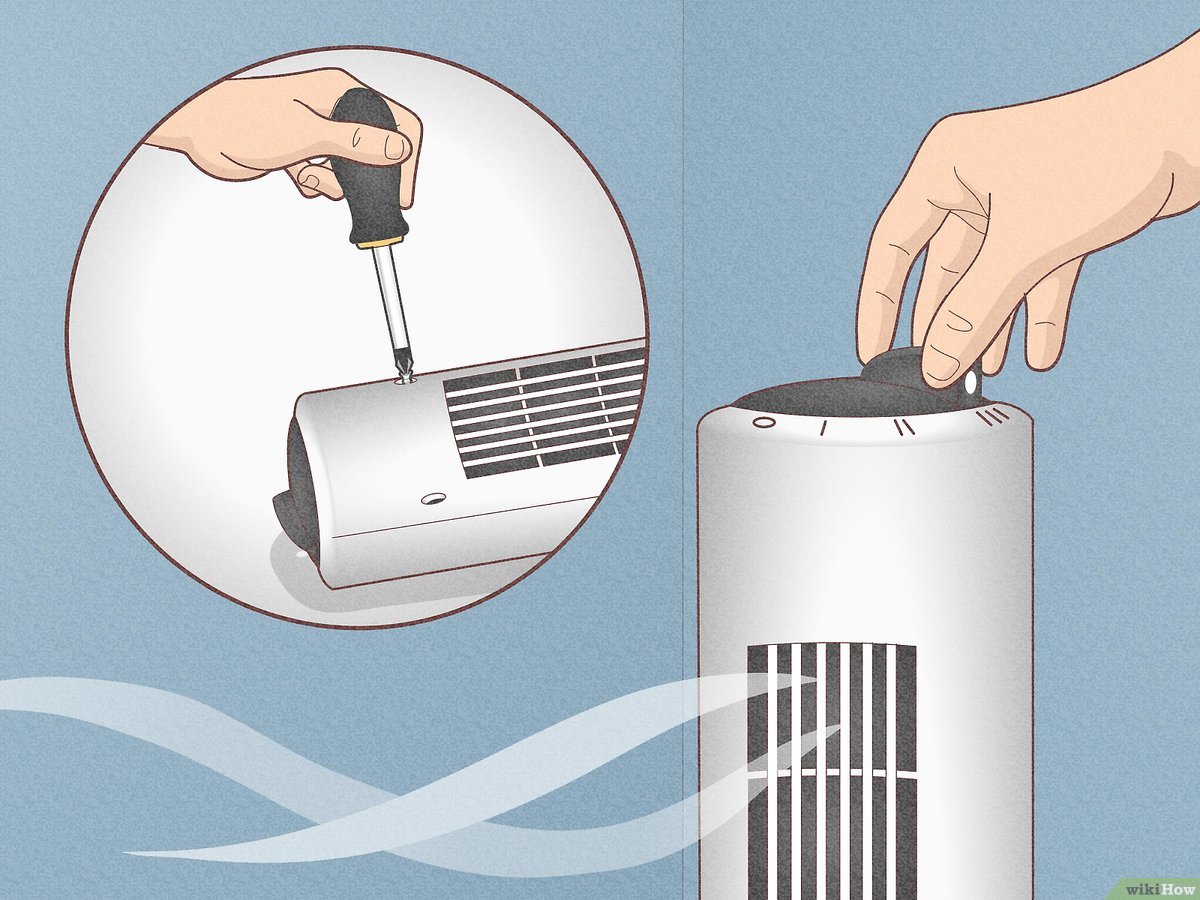
Image source: wikiHow
How to Remove Sticky Grease from Kitchen Fans
Fans located in kitchens, dining rooms, or near open-concept cooking areas face a unique problem: aerosolized cooking oil. When you fry or sauté food, microscopic oil droplets float through the air. When these droplets hit a spinning fan blade, they polymerize, creating a sticky, glue-like film. Standard dust then sticks to this film, creating a stubborn, greasy layer that normal soap and water cannot remove.
Why Standard Soap Fails
Dish soap is designed to lift fresh grease from non-porous plates, but polymerized oil on plastic fan blades requires a stronger chemical reaction to break the bonds. Wiping a greasy fan with a standard wet rag will merely smear the grime, making the blade look cloudy and feel sticky.
The Scrub Mommy Advantage
To break the surface tension of the grease, you need physical agitation combined with the right cleaner. A dual-sided sponge, such as a Scrub Mommy, is an excellent tool for this. Use the textured, firm side to gently scrub the plastic blades. The texture cuts through the sticky film without scratching the plastic beneath.
Chemical Solutions for Heavy Buildup
For the cleaning solution, bypass standard soap and use a dedicated degreaser. Simple Green, diluted according to the bottle's instructions, is highly effective at breaking down kitchen grease. Alternatively, a mixture of warm water and a small amount of household ammonia cuts through polymerized oil quickly. (Safety note: Never mix ammonia with bleach or any bleach-containing products, as this creates toxic gas.) Apply the degreaser to your sponge, scrub the blades, and then perform a final wipe with a clean, damp cloth to remove any chemical residue.
Advanced Maintenance for Better Airflow and Motor Longevity
Beyond simply removing dust, a few advanced maintenance steps can significantly extend the lifespan of your fan and ensure it operates quietly.
The "Oil Bath" Maintenance
While most modern fans feature sealed bearings that never require lubrication, certain high-end or vintage models (such as the classic Hunter Original ceiling fan) utilize an oil bath system. These fans have a small oil hole located on the top of the motor housing. Checking and topping off this oil (using non-detergent SAE 10W or 20W motor oil, never WD-40) is crucial. If the oil runs dry, the metal gears will grind, leading to irreversible motor death. Always consult your specific fan's manual to see if it requires manual oiling.
Cleaning the Remote Control
Fan remote controls are high-touch surfaces that harbor bacteria and grime. To clean the remote, first remove the batteries. Lightly dampen a microfiber cloth or a cotton swab with 70% isopropyl alcohol. Wipe down the surface and gently clean around the edges of the rubber buttons. The alcohol disinfects the surface and evaporates rapidly, preventing liquid from seeping into the circuitry.
Motor Housing Care
The exterior of the motor housing (the plastic shell behind the blades) often features small ventilation slits. Use the crevice tool on your vacuum to ensure these slits are completely free of obstruction. A clear ventilation path allows the motor to shed heat efficiently, which prevents the internal wiring insulation from degrading over time.
| Cleaning Method | Best Used For | Risk Level | Time Required |
|---|---|---|---|
| Vacuum & Brush | Weekly maintenance, light dust | Very Low | 5 minutes |
| Pillowcase Method | Ceiling fans over furniture | Low (Requires ladder safety) | 10 minutes |
| Full Disassembly | Heavy grime, end-of-season storage | Medium (Requires careful reassembly) | 45+ minutes |
| Viral Plastic Bag Hack | Not recommended | High (Electrical damage risk) | N/A |
Frequently Asked Questions
Final Thoughts and Your Fan Cleaning Checklist
Maintaining clean fans is a simple yet highly impactful household chore that improves indoor air quality, lowers energy consumption, and extends the life of your appliances. By avoiding risky viral hacks and relying on proper disassembly or targeted vacuuming, you can keep your fans running quietly and efficiently year-round.
- Disconnect power before beginning any maintenance to ensure total safety.
- Use the pillowcase method for ceiling fans to trap dust and protect your furniture.
- Avoid the plastic bag hack, as spraying liquids into a running fan poses severe electrical risks.
- Inspect the motor shaft for tangled hair or pet fur, which causes friction and overheating.
- Utilize a degreaser like Simple Green for kitchen fans coated in sticky, polymerized cooking oils.
- Enforce a 60-minute drying rule for all washed components before reassembling and restoring power.