Drawing makeup products begins by breaking complex packaging down into 3D primitives—cylinders for lipsticks and mascaras, and rectangular prisms for palettes. To achieve professional results, focus heavily on texture rendering: use high-contrast shading for metallic tubes, stippling for pressed powders, and negative space (white highlights) for glossy liquids. For a highly effective practice method, try facecharting, which involves applying actual cosmetic products to paper templates to master blending and light behavior.
📈 Why Learning to Draw Cosmetics Is a Valuable Skill
The intersection of beauty and illustration is a rapidly expanding field. With the global personal care market reaching approximately $205.50 billion in recent years, according to data published by the National Center for Biotechnology Information (PMC), the demand for beauty-related visual content remains exceptionally strong. Whether you are an aspiring product designer, a makeup artist, or a hobbyist looking to fill a sketchbook, mastering cosmetic illustration offers distinct advantages.
Learning to draw makeup products is fundamentally an exercise in "visual thinking" and creative precision. It forces the artist to observe how light interacts with diverse materials—from the matte wax of a lipstick bullet to the highly reflective chrome of luxury packaging. When approaching this subject, artists generally choose between two distinct paths:
- Product Illustration (Packaging): This focuses on drawing the containers themselves. It requires a solid understanding of industrial design, perspective, and geometric forms.
- Facecharting (Application): This is a professional discipline where artists use actual makeup on a printed 2D face template to plan artistic looks, bridging the gap between traditional drawing and makeup artistry.
This comprehensive tutorial will guide you through both approaches, starting with the geometric foundations of packaging and advancing to the nuanced rendering of cosmetic textures.
📐 What Are the Basic Shapes You Need to Start?
Before attempting to draw a detailed Dior perfume bottle or a complex multi-pan eyeshadow palette, you must understand the underlying geometry. The "3D Primitive Method" is widely regarded as one of the most effective ways to build accurate proportions. Every makeup product in your vanity can be deconstructed into three basic shapes.
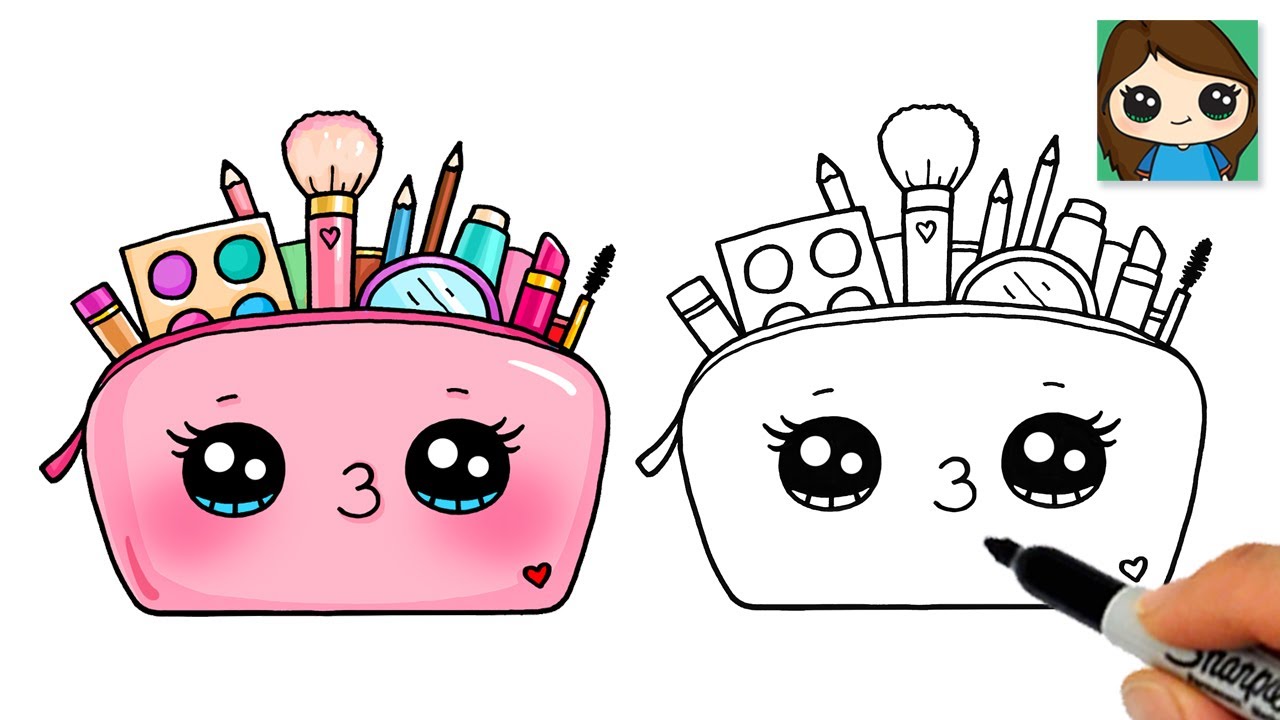
Image source: YouTube
The Cylinder Foundation
Cylinders are the most common shape in cosmetic packaging. They form the foundation for lipsticks, mascara tubes, liquid eyeliners, lip glosses, and makeup brush handles. When drawing a cylinder in perspective, remember that the top and bottom edges are not flat lines; they are ellipses (squashed circles). The closer the cylinder is to your eye level, the flatter the ellipse appears.
Rectangular Prisms
Rectangular prisms (3D boxes) are the basis for eyeshadow palettes, blush compacts, and luxury gift boxes. Drawing these requires a basic understanding of one-point or two-point perspective to ensure the lines recede correctly into the distance, giving the palette a sense of depth rather than looking like a flat square on the page.
Spheres and Ovals
Spheres and flattened ovals are frequently used for cushion foundations, domed baked blushes, and beauty blenders. Shading these shapes requires a smooth gradient from the core shadow to the highlight to create the illusion of a rounded surface.
💄 How to Draw a Realistic Lipstick in Five Simple Steps
The lipstick is often considered the quintessential makeup product to draw due to its recognizable silhouette. Standard tutorials, such as those found in popular drawing and coloring guides, emphasize the slanted top as the defining feature. Here is a step-by-step breakdown for achieving a realistic result.
🎨 How to Draw a Professional Eyeshadow Palette
Drawing an open eyeshadow palette introduces the challenge of perspective and symmetry. A palette drawn flat from a top-down view lacks visual interest, so it is highly recommended to draw it open at a 45-degree angle.
The "Hinge and Lid" Logic
Start by drawing a flat rectangular prism for the base. Then, draw a second rectangular prism attached to the back edge, angled upward. Pay close attention to the hinge mechanism—it is usually a small cylindrical joint connecting the two halves. Ensuring the lid and the base share the same vanishing point is crucial for realism.
Grid Layout for the Pans
The "pans" (the metal squares or circles holding the powder) must be perfectly aligned. Lightly sketch a perspective grid across the base of the palette. Use this grid to place your pans, ensuring they get slightly smaller and closer together as they recede toward the back of the palette.
✨ How to Render Different Cosmetic Textures on Paper
The difference between a beginner sketch and a professional illustration often comes down to texture rendering. Makeup products offer a fantastic variety of surfaces to practice on. Below is a breakdown of how to approach the four most common cosmetic textures.
🪞 Metallic & Chrome
Found on luxury lipstick tubes and compacts. To render chrome, you need high-contrast gradients. Place deep, dark shadows immediately next to pure white highlights. The transition between dark and light should be abrupt, mimicking how metal reflects its environment sharply.
🌫️ Pressed Powder
Found in eyeshadows, blushes, and bronzers. Avoid smooth shading. Instead, use a technique called "stippling" or pointillism. Tap your pencil or marker repeatedly to create a dense cluster of tiny dots, which perfectly mimics the grainy, compressed pigment of powder products.
💧 Glossy Liquids
Found in lip glosses, nail polishes, and glass foundation bottles. The secret here is "negative space." You must leave stark white areas on the paper to represent light hitting the wet or glass surface. A white gel pen is an excellent tool for adding these final, sharp "hotspots" over colored markers.
🍑 Matte Finishes
Found in liquid lipsticks and soft-touch packaging. Matte surfaces diffuse light, meaning they have no sharp highlights. Use a tortillon (blending stump) to create incredibly soft, even, and gradual transitions between your shadows and mid-tones.
| Texture Type | Drawing Technique | Visual Goal |
|---|---|---|
| Metallic | High-contrast gradients, sharp edges | Reflective, luxury, rigid feel |
| Powder | Stippling / Pointillism | Grainy, compressed pigment |
| Liquid/Glass | White "hotspots", negative space | Wet, transparent, or highly shiny |
| Matte | Soft, even blending with a stump | Non-reflective, smooth, diffused light |
👩🎨 Why Professional Artists Use Facecharts to Plan Their Looks
While illustrating packaging is popular, many makeup artists focus on facecharting. A facechart is a printed outline of a face on textured paper, used by artists to design and record makeup looks before applying them to a human client.
The Hybrid Workflow
Facecharting represents a unique hybrid workflow. Instead of using traditional colored pencils or markers, professionals often use actual cosmetic products—eyeshadows, blushes, and lipsticks—to color the paper. This technique is widely considered one of the most effective ways to understand how makeup behaves.
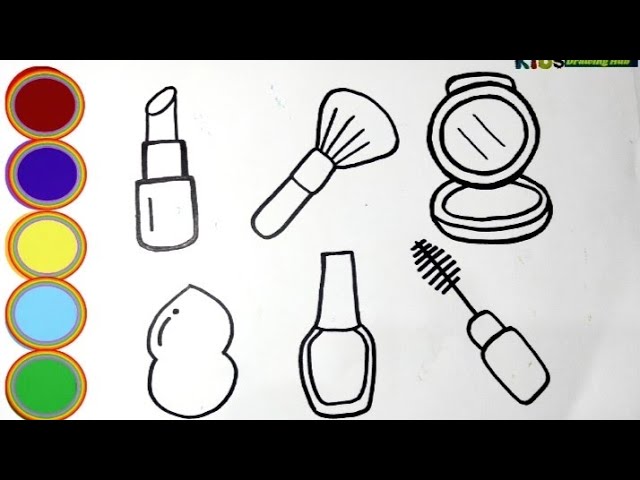
Image source: YouTube
Applying eyeshadow to paper with a cosmetic brush trains the exact same fine motor skills required for applying it to a human eyelid. It teaches the artist about pigment payoff, blending limits, and color theory in a low-stakes environment. If you have expired makeup that is no longer safe for skin use, repurposing it for facechart art is an excellent, sustainable practice.
🎀 How to Draw a Cute Kawaii Makeup Kit
Not all makeup drawings need to be hyper-realistic. There is a massive community dedicated to the "Kawaii" (cute) art style, which is particularly popular among beginners and hobbyists. As seen in numerous easy makeup kit tutorials, this style relies on specific visual cues.
Simplifying Proportions
To make a product look cute, you must alter its proportions to be more "chibi" (short and chubby). Instead of a long, elegant mascara tube, draw a short, wide, rounded cylinder. Soften all sharp corners; a Kawaii eyeshadow palette should have rounded edges rather than sharp 90-degree angles.
Adding Personality and Color
The hallmark of this style is anthropomorphism—adding faces to inanimate objects. Place two wide-set, large eyes and a tiny smiling mouth in the center of your lipstick tube or blush compact. When coloring, abandon realistic metallic tones in favor of a bright, pastel palette. Bubblegum pink, mint green, lavender, and soft yellow are top-tier choices for this aesthetic.
🔧 How to Fix Common Drawing Mistakes Like Smudging and Asymmetry
Even experienced artists encounter frustrating setbacks when drawing cosmetics. Here are practical solutions to the most common pitfalls.
The Smudge Factor
When working with graphite, soft colored pencils, or actual makeup on paper, smudging is almost inevitable. The oils from your hand will drag the pigment across the page. The Fix: Always keep a clean piece of scrap paper (a "slip sheet") under your drawing hand. If you are using real makeup for a facechart, seal the finished piece with a workable matte fixative spray to lock the powder in place.
Proportion Problems
A frequent mistake beginners make is drawing the mascara wand or the lip gloss applicator far too thick to actually fit inside the tube they just drew. The Fix: Always draw the opening of the tube first, and use that diameter as a strict guide. The wand handle can be thick, but the applicator itself must be visibly narrower than the tube's opening.
Symmetry Hacks
Drawing a perfectly symmetrical compact or palette freehand is difficult. The Fix: Before drawing the object, draw a faint vertical "center line" down your page. Measure equal distances from this center line to place the left and right edges of your palette. This ensures the object does not look lopsided.
Safety Note: If you are drawing with children or using actual cosmetics on paper, ensure the products are non-toxic. The toxicological impact of certain synthetic beauty products is a growing concern, making standard art supplies a safer choice for young artists.
🎒 What Materials Do You Actually Need?
Your choice of materials will dictate the final look of your illustration. Here is a breakdown of recommended kits based on your goals.
Ideal for Kawaii styles and basic sketching. You will need smooth, heavyweight white paper (to prevent marker bleed-through), an HB pencil for light sketching, a 2B pencil for darker outlines, and a set of alcohol-based markers (like Copic or Ohuhu). Alcohol markers are highly recommended because they blend seamlessly without leaving streak marks.
For facecharting and realistic rendering. You will need specialized facechart paper (which has a slight "tooth" or texture to grip powder), actual cosmetic brushes (small detailing brushes work best), and a variety of expired or inexpensive powder eyeshadows and blushes. A white gel pen is essential for adding glossy highlights.
For iPad or tablet artists. Software like Procreate or Adobe Photoshop is standard. To mimic traditional media, seek out custom brush packs designed specifically for cosmetic illustration—look for brushes labeled "stipple," "soft blend," and "chalk" to replicate the look of powders and creams.
❓ Frequently Asked Questions
- What is the easiest makeup product to draw for a beginner?
- Lipstick is widely regarded as the easiest product to start with. Its basic structure is just a simple cylinder with a slanted top, making it an excellent subject for practicing 3D shapes and basic shading without getting bogged down in complex details.
- Can I use real makeup to color my drawings?
- Yes, this technique is known as facecharting. It is highly effective for learning how makeup blends. However, real makeup will smudge easily on standard printer paper. It is best to use textured watercolor paper or specialized facechart paper, and you must seal the final drawing with a fixative spray.
- How do I make my makeup drawings look 3D?
- The illusion of 3D relies entirely on lighting. You must establish a consistent light source. For curved objects like tubes, ensure you have a bright highlight on one side, a mid-tone in the middle, and a dark "core shadow" on the opposite side, followed by a slight bounce light on the very edge.
- How do you draw a realistic makeup brush?
- Break the brush into three parts: the wooden/plastic handle (a long cylinder), the metal ferrule (a shorter, reflective cylinder), and the bristles. For the bristles, do not draw a solid block; use quick, flicking pencil strokes starting from the ferrule and tapering outward to create a soft, textured edge.
- Why does my drawn eyeshadow palette look flat?
- A flat-looking palette usually lacks perspective and internal shadows. Ensure you are drawing the palette at an angle (using vanishing points). Additionally, add a thin, dark crescent shadow inside the top rim of each eyeshadow pan to show that the powder sits slightly below the surface of the plastic casing.
🏁 Final Thoughts and Your Drawing Checklist
Drawing makeup products is a rewarding skill that combines the precision of industrial design with the glamorous aesthetics of the beauty industry. Whether you are sketching a cute Kawaii kit or rendering a hyper-realistic chrome lipstick tube, success comes down to observing shapes and understanding light.
- Start with 3D primitives: Always block out your products using basic cylinders, spheres, and rectangular prisms before adding details.
- Master the slanted top: The defining feature of a lipstick is the 45-degree teardrop cut of the wax bullet.
- Match technique to texture: Use stippling for grainy powders, high-contrast shading for metals, and negative space for glossy liquids.
- Try facecharting: Repurpose expired cosmetics to color paper templates, which effectively trains your blending and application skills.
- Protect your work: Always use a slip sheet under your hand to prevent smudging, and seal powder-based drawings with fixative.
Grab an HB pencil, pick your favorite lipstick tube from your vanity, and try sketching its basic cylindrical outline right now.